
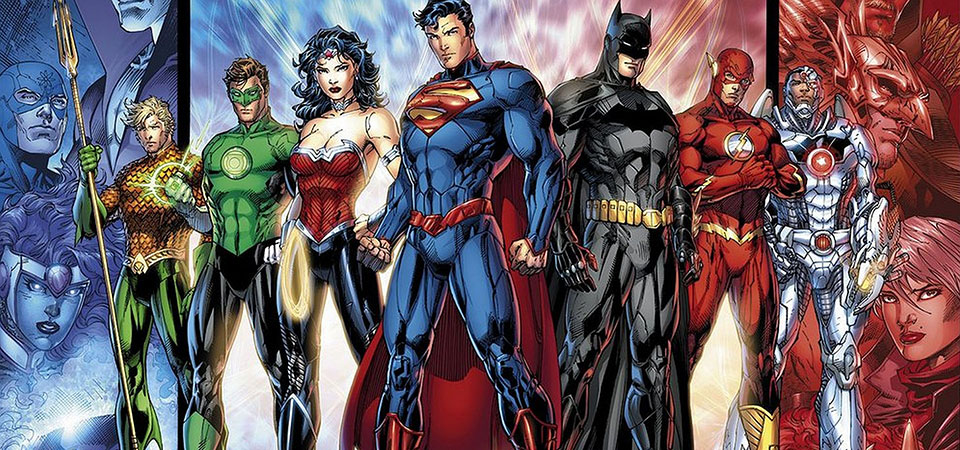
Image Gallery Example


< < How to add a gallery like this to your website > >
This gallery works best with large images as they will get stretched across the screen. There is no need to make thumbnails.
Step 1: Copy the 'gallery' folder from the common drive and paste it into your images folder.
Step 2: Save this file to the 'css' folder inside your website folder (right-click and select 'save file as'): gallery_styles.css
Step 3: Link your webpage to the same CSS file and an important JavaScript file by adding the following lines of code (copy & paste):
<link href="css/gallery_styles.css" rel="stylesheet" type="text/css">
<script src="https://cdnjs.cloudflare.com/ajax/libs/jquery/3.1.1/jquery.min.js"

	type="text/javascript"></script>
Insert the code near the top of your page in 'Code View' as shown in this image:

Step 4: Copy the following HTML and (in 'Code View') paste it where you want the slide show to be (for example after your page heading).
    	<!-- START GALLERY HTML -->

    		<div class="gallery">

            <div class="img-w"><img src="images/gallery/gallery1.jpg" alt="batman" /></div>

            <div class="img-w"><img src="images/gallery/gallery2.jpg" alt="Flash" /></div>

            <div class="img-w"><img src="images/gallery/gallery3.jpg" alt="Guardians" /></div>

            <div class="img-w"><img src="images/gallery/gallery4.jpg" alt="Raccoon" /></div>

            <div class="img-w"><img src="images/gallery/gallery5.jpg" alt="Hulk" /></div>

            <div class="img-w"><img src="images/gallery/gallery6.jpg" alt="Various" /></div>

            <div class="img-w"><img src="images/gallery/gallery7.jpg" alt="NightWing" /></div>

            <div class="img-w"><img src="images/gallery/gallery8.jpg" alt="Spiderman" /></div>

            <div class="img-w"><img src="images/gallery/gallery9.jpg" alt="Superman" /></div>

            <div class="img-w"><img src="images/gallery/gallery10.jpg" alt="Superman" /></div>

            <div class="img-w"><img src="images/gallery/gallery11.jpg" alt="Xena" /></div>

            <div class="img-w"><img src="images/gallery/gallery12.jpg" alt="Someone" /></div>

            </div>


            <script>

            $(function() {

            	$(".img-w").each(function() {

            	$(this).wrap("<div class='img-c'></div>")

            		let imgSrc = $(this).find("img").attr("src");

            	$(this).css('background-image', 'url(' + imgSrc + ')');

            })


            $(".img-c").click(function() {

            let w = $(this).outerWidth()

            let h = $(this).outerHeight()

            let x = $(this).offset().left

            let y = $(this).offset().top


            $(".active").not($(this)).remove()

            let copy = $(this).clone();

            copy.insertAfter($(this)).height(h).width(w).delay(500).addClass("active")

            $(".active").css('top', y - 8);

            $(".active").css('left', x - 8);


            setTimeout(function() {

            	copy.addClass("positioned")

            }, 0)


            })

            })


            $(document).on("click", ".img-c.active", function() {

            let copy = $(this)

            copy.removeClass("positioned active").addClass("postactive")

            setTimeout(function() {

            	copy.remove();

            }, 500)

            })


            </script>

            <!-- END GALLERY HTML -->
Step 4: Replace the images in the 'gallery' folder with your own images. Your images need to be named in the same way for the code to work. It is highly recommended to resize your images so that they are all the same width and height.
Step 5: Tidy up your code by replacing the 'alt:' text as shown below. The words you use should describe the image.
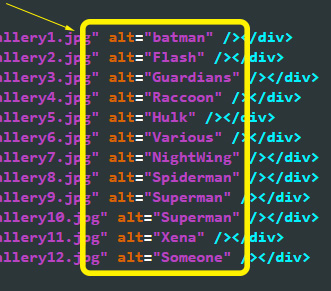
Good luck and let me know if you have any issues!