Formative Tasks - Tutorials & Mini Makes
Tutorials
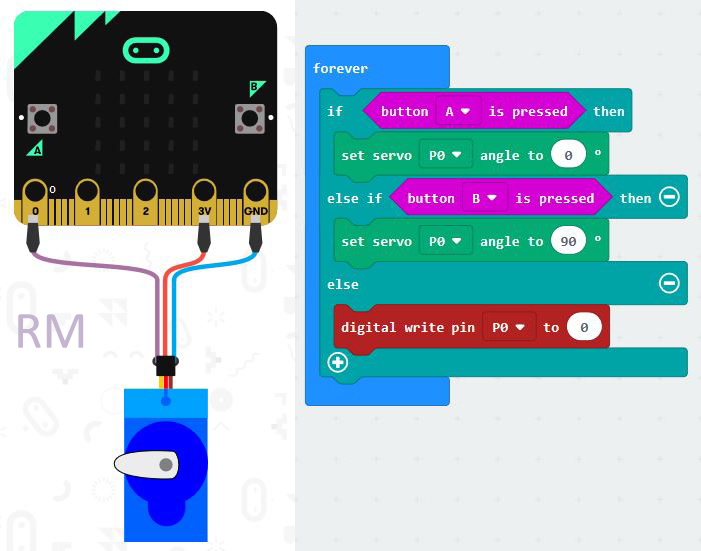
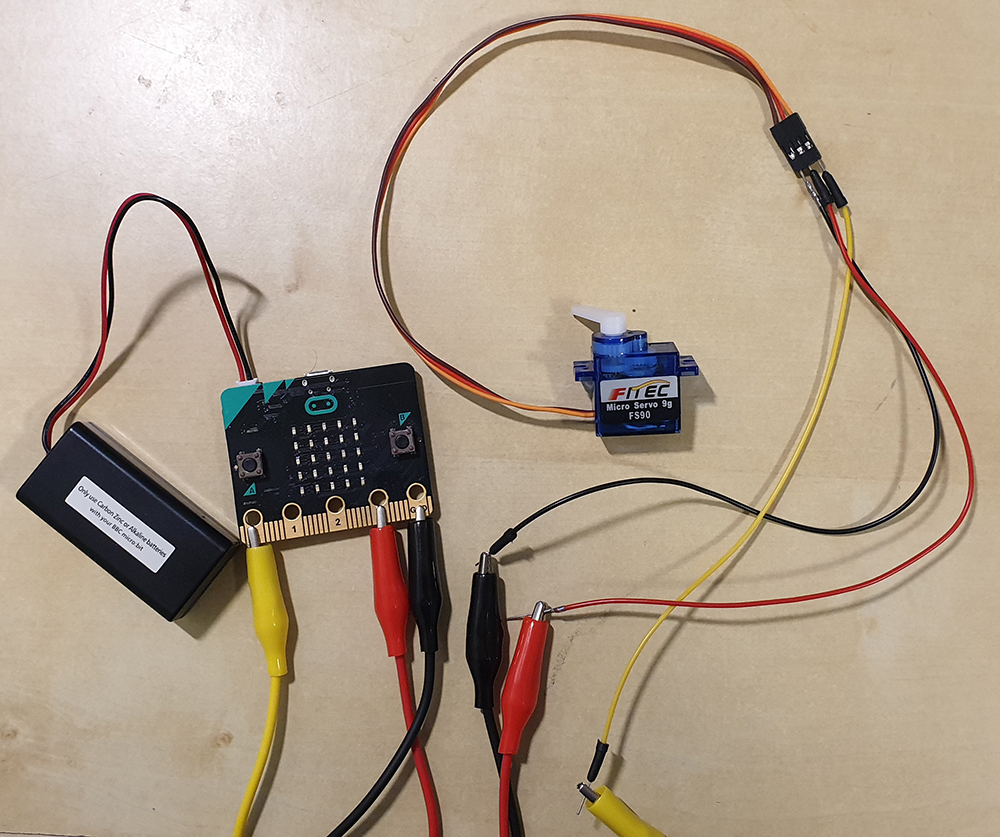
Mini Make 1: Servo MotorIn this make you will learn what a servo motor is, how to connect it to a microbit and how to code it in MakeCode. After watching the tutorial below, complete the questions in your journal.
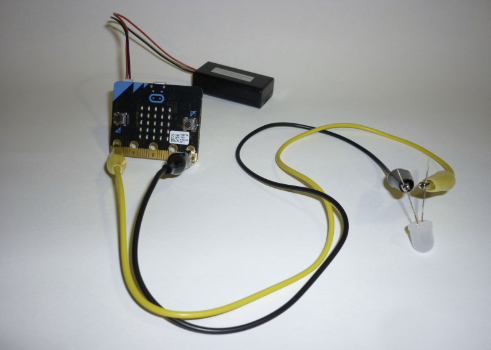
Mini Make 2: External LED LightIn this make you will connect the micro:bit to an external LED (Light Emmitting Diode).
|
||||||||||||||||||