Extension Task: Reaction Time Game
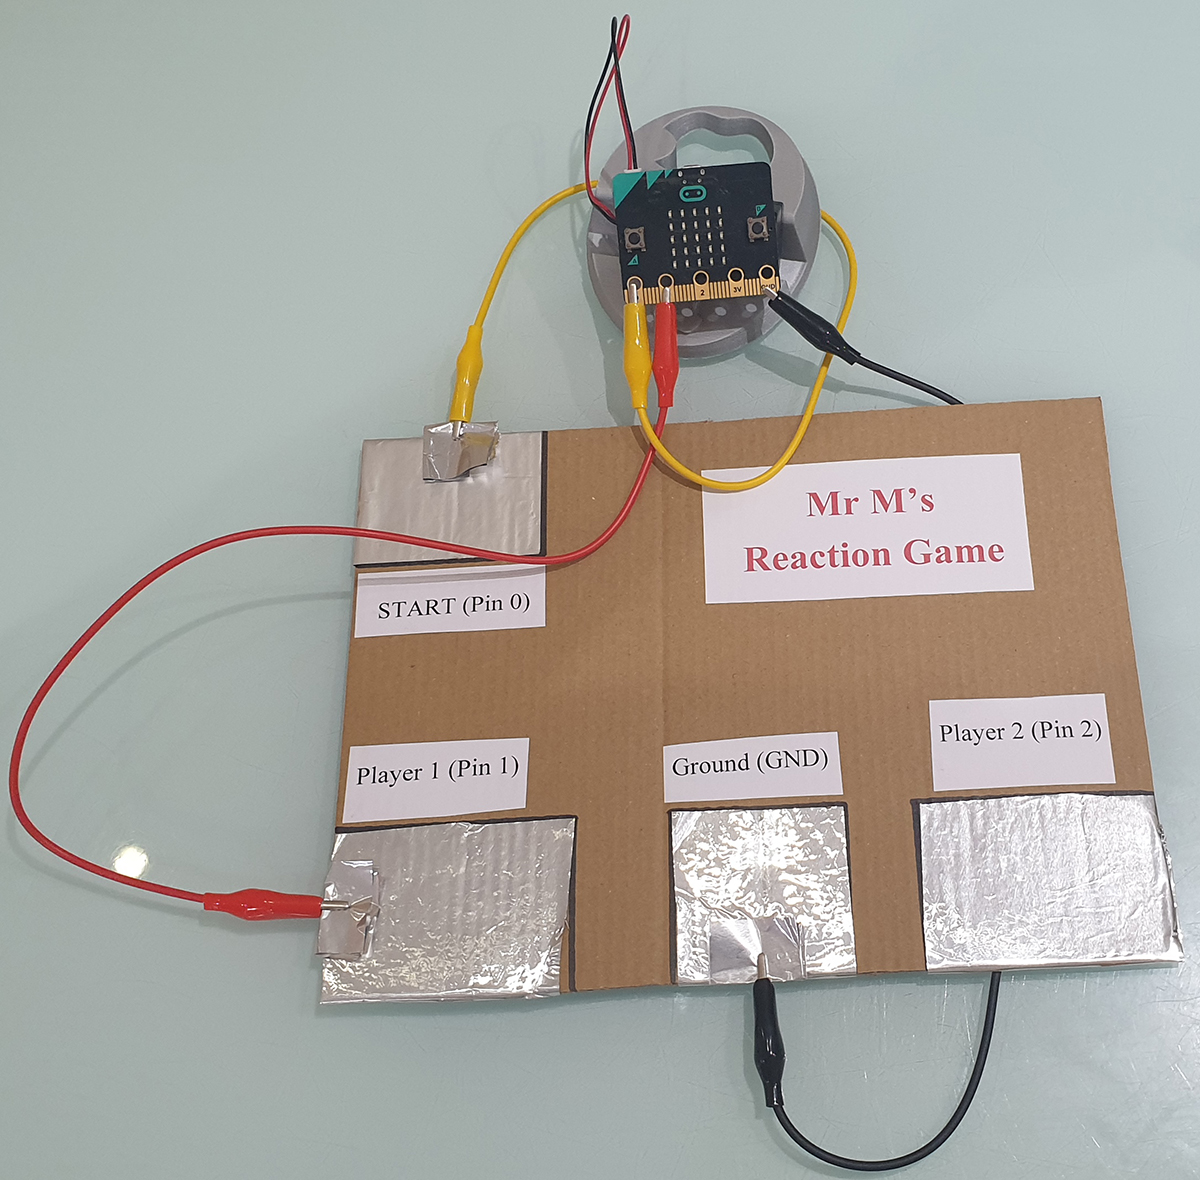
Creating the Game BoardFirst you will need to create the physical game using cardbaord and foil. The final design is up to you but to give you an example, watch the video below.
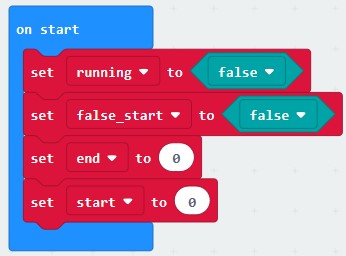
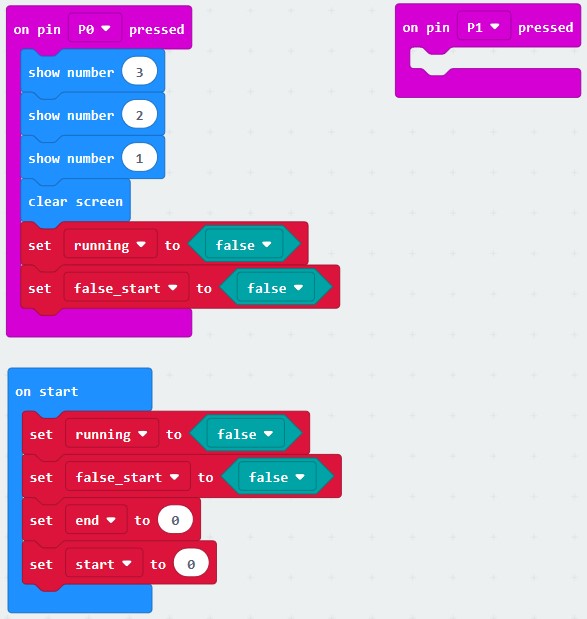
Grab the materials you need and start making your Game Board (see above). Connect each piece of foil to the appropriate pin on the micro:bit using aligator clips. Note: For this make we are NOT using the P2 pin as shown in the video. (Because you are going to create Single Player NOT Two Player) Creating the Micro:bit CodeStep 1: VariablesIn order for Reaction Time to track the speed of a a player’s reaction, we need to add variables to keep some data. We initialize (assign, or set) the variables to some starting values. The variables needed are: start, end, false_start, and running. Set the values of variables start and end to 0, which means no time elapsed. Then set the value of the variables false_start and running to false to say we haven’t started yet. So, our tracking variables do this:
Add these variables to your code:
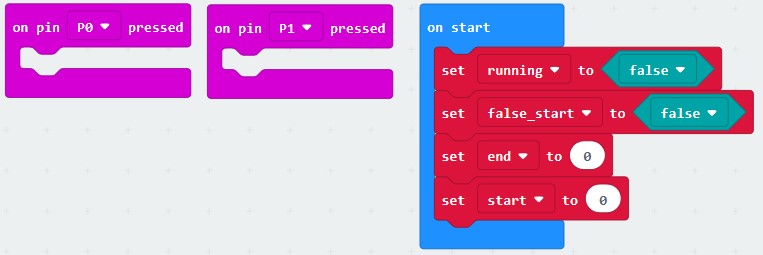
Step 2: On pin pressedWe need to register event handlers that will execute whenever the user presses down on the GND pin with one hand, and presses pin P0 or P1 with the other hand, which completes the circuit. You will need two event handlers on pin pressed blocks, one for P0 and the other for P1. Add the on pin pressed blocks to your code:
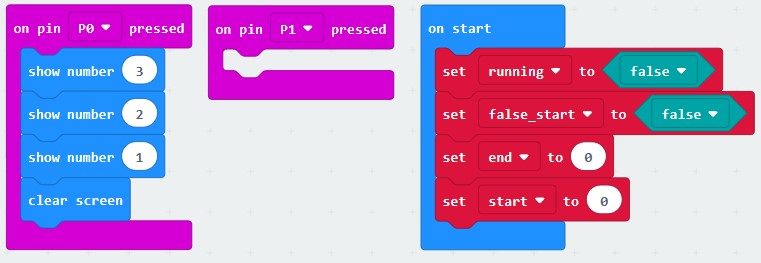
Step 3: Countdown timerWe need a countdown timer that shows the seconds counting down when pin P0 is pressed. Let’s insert three show number blocks to visually display the countdown sequence: 3…2…1. Next, add a clear screen block to clear the numbers from the screen. Modify your code so that it looks like this:
Step 4: BooleanNow we’ll set the variables running and false_start to false in the P0 event. Add the set to blocks for running and false_start like this:
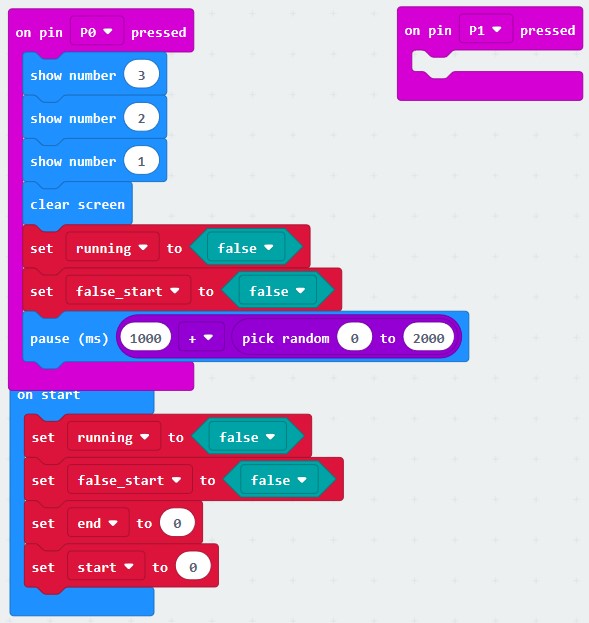
Step 5: Begin reaction time randomlyLet’s add a random starting time after pin P0 is pressed. Include the random block in a pause at the bottom of the event block like this:
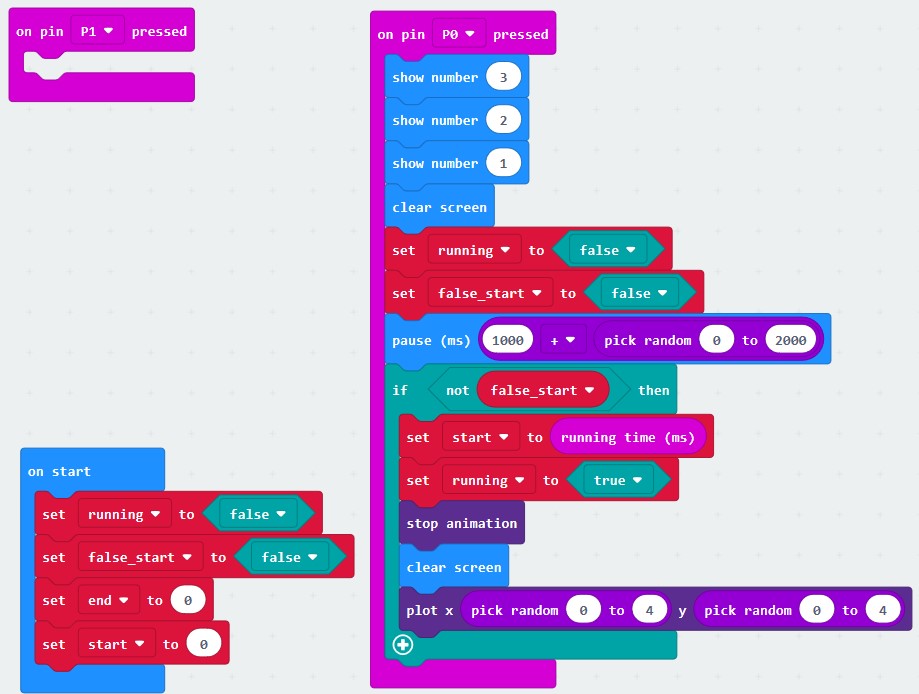
Step 6: Plot LED on X, Y coordinates randomlyThe reaction time will begin if no false start is detected (pin P0 pressed at the wrong time). When the reaction time starts, an LED is randomly plotted at some the X and Y coordinate on the display. Add in the blocks contained in the if then that show the reaction time:
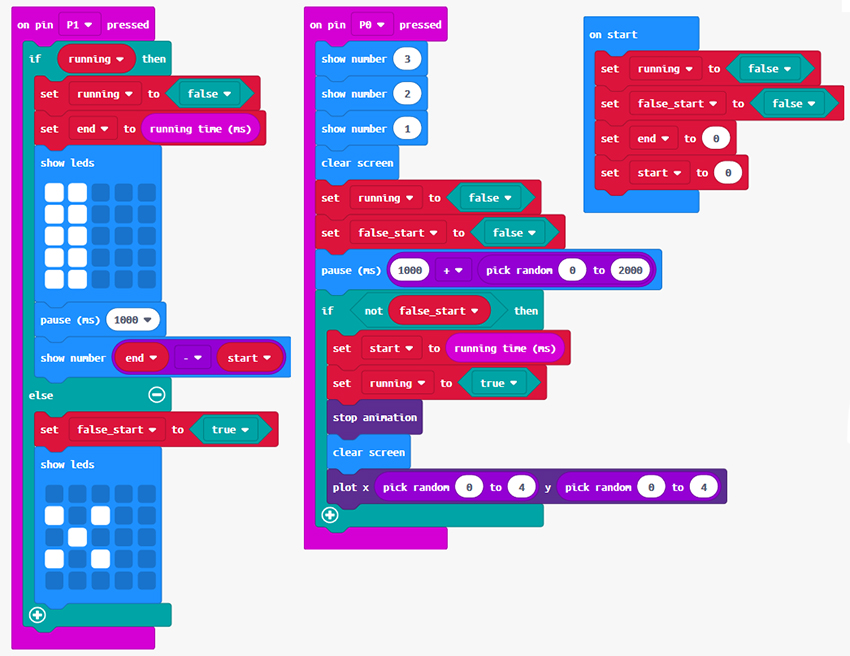
Step 7: Display feedback to reactionAdd some code to detect when the player presses the GND foil with one hand and the P1 pin with the other. This code detects the circuit connection and shuts off the timer. Also, add code to have the micro:bit read the time in milliseconds from when the timer starts and the circuit is completed. This code also detects if there is a correct reaction or false start if pin P1 is pressed. Let’s display one of two images if pin P1 is pressed. The first image displays if the player correctly completes the circuit between GND and P1. This means that a correct reaction occurred to complete the circuit with pin P1 pressed after the randomly generated LED appears. The second image displays if the player completes a circuit between GND and P1 but on a false start. A false start is detected if the player completes a circuit if pin P1 is pressed before the LED randomly appears at its random x, y coordinate. Modify the code to include the actions for the pin P1 event:
To Play - Single Player
Modifications
|